Loc Knots – how to create +20 Examples of lock knots hairstyles.

Loc knots are a versatile hairstyle where locs are twisted and secured to form barrel-like knots.

Traditionally done on dreadlocks, this style can also be applied to faux locs variants such as soft locs, bohemian locs, and butterfly locs.

How to Create Loc Knots on Long Locs

  1. Ponytail Preparation: Gather your locs into a ponytail using a hair tie.
    Wrap 3 to 4 locs around the hair tie to conceal it, securing any loose locs with bobby pins.
  2. Twisting Locs: Select two locs and twist them together from right to left to maintain their shape. Leave a portion of the ends untwisted.
  3. Forming the Knot: Bend the twisted section upward and wrap the untwisted ends back down around the twist, creating a barrel shape. Secure the end with a rubber band.

For a visual guide, refer to this tutorial:

How to Create a Loc Knot Bob

  1. Twisting Locs: Without gathering into a ponytail, twist two locs together from right to left, stopping about a quarter of the way down.
  2. Forming the Knot: Bend the twisted section upward and wrap the remaining length back down around the twist.
  3. If there’s excess length, wrap it back up. Secure the end with a rubber band or by crocheting the ends in.

For a visual guide, refer to this tutorial:

Video Transcript for quick reference:
you will need small black rubber bands
i also like to use finishing sheen it gives the locks a little bit of shine
to them after styling.
i like to start styling from the back so i would take two from the back row and i will twist them right over left, it’s very important that you’re going
right over left so that the lock keep its shape then you will pull the lock upward and then wrap it down make sure when you’re wrapping it down that you’re pulling it tight not too tight to where it hurts the client’s head tight enough so that you know everything is nice and secure.
since these are 24 inch soft locks for the back row you will kind of have to wrap the excess hair up and then secure it with a rubber band so once again i am twisting right over left then i am pulling the lock up and then wrapping the lock back down and please make sure that it’s nice and secure when you’re wrapping down.
after i wrap the locks i am securing them with a small black rubber band making sure that i put all the loose pieces in the rubber band so that no hair pops out the side.
please make sure when you’re twisting your locks you want to fill in the gaps so as you can see i turned the lock to
the side and then i started twisting it down and then i do the same thing pull the hair back up and then wrap down
when you pull pulling the lock to the side you’re simply just kind of pulling one strand of hair to the direction you
would like the lock to go and then you will begin your twisting filling in the gaps are important because you don’t want all the locks to lay on top of each other you want them to fall in each gap so it gives the back a fuller look
for this row i do the same thing i pull the hair towards the middle so that the middle section can start getting full
and of course i repeat the same process pulling up and then wrapping it down for this middle lock as you can see i’m
just twisting it straight down because there is no hair right there so i’m filling in that gap so that it won’t be such a large gap anymore and of course i am measuring the locks to the other locks that i’ve already did so everything is nice and even , and sometimes you may have a little flap all i do is just fold that up and i secure it with the rubber band the same way i did any other lock.

for this next set of locks i do the same
thing and pull it towards the middle and
then i begin the twisting pfor this next set of locks i do the same
thing and pull it towards the middle and
then i begin the twisting process
after i complete the back three rows
i then go towards the side that will
have the side part on it
so when i start making the side that has
the part on it
i always twist the locks towards the
back
just so that when she decides to tuck
one piece behind her ear it won’t be as
bulky
today i am not doing an asymmetrical bob
so all of her locks will be cohesive
with the other side
and then for her lock that’s right
behind it i just twist it straight down
but can we get into the view though like
i really love my windows i can see
everything outside and the grass is
always so
green and this lock on the side i
measured it towards the back so that it
can be even with the back row
so once again i’m pulling this lock
towards the back and then i begin
twisting
i measured this lock with the first lock
that i did on the side and then i do the
same process
pull up
and wrap down
this next lock
i fill in the little gap that will be in
between the first lock and then the
second
this is where her part is going to be so
this last lock towards the front i still
twist it a little bit back not too far
back as the other ones
and then you know of course i wrap up
and then wrap down
then i will use this last lock and fill
in the gap
if you look at the lock that i did to
start the part
you can see how it’s falling down and
isn’t laying over any lock
so it’s easy to maneuver if she wants to
tuck it behind her ear
please make sure the barrels are nice
and tight
you do not want them barrels to unravel
and of course secure them with a black
rubber band
after i complete the side i go back
towards the back
so then i start on that next row
and then of course i am filling in the
gaps and twisting down
fantastic
this is just my technique on how i do my
lock bob
so you can start wherever you feel
comfortable but i just like to do it
this way so that i make sure that every
gap is filled and it forms and falls the
way i want it to fall
the more you go up you’ll kind of start
noticing
what gaps need to be filled
fantastic
to make sure everything blends well i
take this next lock and then i pull it
to the side so that it blends with the
first half that i already did
fantastic.
and please don’t forget to fill in the
gaps
we’re almost done with the back but as
you can see how full it looks
by just filling in all the gaps
now we’re on the side that will hang
so as you can see i’m kind of counting
off to see how many
more twists i have to go and make sure
every twist has a pair
so i don’t usually count
my parts i usually just go by the pack
so i use about four packs of new lock
bobby boss hair i’m going to also put it
in the description below
if you do want to count your parts you
know that’s perfectly fine as well i
just personally don’t do it
so i still do fill in the gaps but i
also frame the face
so the locks that are you know around
the perimeter of her hair i always pull
it towards the front so that it hangs
and lays and frames her face correctly
i only pull it towards the front on the
side that she wants her
hair to lay so she all wants it to the
right side i only frame the face on the
right side
feel me
i measure this lock with the first lock
i already did just to make sure that
everything is even
this lock i just switched straight down
so that it fills in this gap
i take this lock and fill in the gap so
that the back blends with the front
feel
me here’s a better view of me framing
her face
so i twist the locks towards the front
and then i kind of measure it just a
little bit above
the lock i already previously did
if you look at the first locks that i’ve
already done
you can kind of see that they are
layered i am purposely layering the lock
so that it frames her face
i measured this lock above the previous
lock i just did so that it frames her
face a little bit better
this lock will be measured with the last
lock that i’ve done to frame her face
now it’s time to make the bang
so i will take the first two locks from
the front and i kind of twist it a
little bit back
so that it can lay
in between the locks correctly
this lock will measure with the last
lock so that they are even
i measure this lock with the last two
locks that i’ve done
so that everything can stay cohesive and
that these locks can frame her face
i do this so no locks lay over top of
each other and it lays flat at the top
this lock will be measured with the
locks at the bottom
so that it fills in the space and it
gives it a full look
once i complete all the locks i just
take my hand and i kind of bumped the
locks underneath so that everything kind
of frames and lays the way i want it to
lay so if any locks are sticking up
because they are so soft you can
literally just take your hand and just
bend them back down or bend it the way
you would like it to lay
i use this got to be
high insta hold spray to spray on her
edges before i put on edge control
this is the only edge control i use so i
use even 24 hour edge tank
i am taking the gel and i’m just rubbing
it across her parts
and then i’ll take my edge brush i’ll
comb it down first and then i’ll brush
over top of it to smooth everything out
the key to doing edges is using your
fingers as a guide
use your fingers to bend the hair the
way you would like it to go
to hold pieces that you would like to
stay down like use your hand
i like to just take my comb and kind of
swoop it down in a like a half c form
and then i’ll take the brush and do the
same way
every time i comb it in a half seed i’ll
brush it down in a half seed
and i take my finger and i kind of run
behind it so that everything is smooth
all the product is in her hair
depending on your hair type sometimes
you may need a little bit more product
if it doesn’t lay down with the first
coat that you put on you can take a
little bit more product and just go over
the spots that are
kind of lifting or the spots you feel
like need more edge control
and this is the finished product.

rocess
after i complete the back three rows
i then go towards the side that will
have the side part on it
so when i start making the side that has
the part on it
i always twist the locks towards the
back
just so that when she decides to tuck
one piece behind her ear it won’t be as
bulky
today i am not doing an asymmetrical bob
so all of her locks will be cohesive
with the other side
and then for her lock that’s right
behind it i just twist it straight down
but can we get into the view though like
i really love my windows i can see
everything outside and the grass is
always so
green and this lock on the side i
measured it towards the back so that it
can be even with the back row
so once again i’m pulling this lock
towards the back and then i begin
twisting
i measured this lock with the first lock
that i did on the side and then i do the
same process
pull up
and wrap down
this next lock
i fill in the little gap that will be in
between the first lock and then the
second
this is where her part is going to be so
this last lock towards the front i still
twist it a little bit back not too far
back as the other ones
and then you know of course i wrap up
and then wrap down
then i will use this last lock and fill
in the gap
if you look at the lock that i did to
start the part
you can see how it’s falling down and
isn’t laying over any lock
so it’s easy to maneuver if she wants to
tuck it behind her ear
please make sure the barrels are nice
and tight
you do not want them barrels to unravel
and of course secure them with a black
rubber band
after i complete the side i go back
towards the back
so then i start on that next row
and then of course i am filling in the
gaps and twisting down
fantastic
this is just my technique on how i do my
lock bob
so you can start wherever you feel
comfortable but i just like to do it
this way so that i make sure that every
gap is filled and it forms and falls the
way i want it to fall
the more you go up you’ll kind of start
noticing
what gaps need to be filled
fantastic
to make sure everything blends well i
take this next lock and then i pull it
to the side so that it blends with the
first half that i already did
fantastic.
and please don’t forget to fill in the
gaps
we’re almost done with the back but as
you can see how full it looks
by just filling in all the gaps
now we’re on the side that will hang
so as you can see i’m kind of counting
off to see how many
more twists i have to go and make sure
every twist has a pair
so i don’t usually count
my parts i usually just go by the pack
so i use about four packs of new lock
bobby boss hair i’m going to also put it
in the description below
if you do want to count your parts you
know that’s perfectly fine as well i
just personally don’t do it
so i still do fill in the gaps but i
also frame the face
so the locks that are you know around
the perimeter of her hair i always pull
it towards the front so that it hangs
and lays and frames her face correctly
i only pull it towards the front on the
side that she wants her
hair to lay so she all wants it to the
right side i only frame the face on the
right side
feel me
i measure this lock with the first lock
i already did just to make sure that
everything is even
this lock i just switched straight down
so that it fills in this gap
i take this lock and fill in the gap so
that the back blends with the front
feel
me here’s a better view of me framing
her face
so i twist the locks towards the front
and then i kind of measure it just a
little bit above
the lock i already previously did
if you look at the first locks that i’ve
already done
you can kind of see that they are
layered i am purposely layering the lock
so that it frames her face
i measured this lock above the previous
lock i just did so that it frames her
face a little bit better
this lock will be measured with the last
lock that i’ve done to frame her face
now it’s time to make the bang
so i will take the first two locks from
the front and i kind of twist it a
little bit back
so that it can lay
in between the locks correctly
this lock will measure with the last
lock so that they are even
i measure this lock with the last two
locks that i’ve done
so that everything can stay cohesive and
that these locks can frame her face
i do this so no locks lay over top of
each other and it lays flat at the top
this lock will be measured with the
locks at the bottom
so that it fills in the space and it
gives it a full look
once i complete all the locks i just
take my hand and i kind of bumped the
locks underneath so that everything kind
of frames and lays the way i want it to
lay so if any locks are sticking up
because they are so soft you can
literally just take your hand and just
bend them back down or bend it the way
you would like it to lay
i use this got to be
high insta hold spray to spray on her
edges before i put on edge control
this is the only edge control i use so i
use even 24 hour edge tank
i am taking the gel and i’m just rubbing
it across her parts
and then i’ll take my edge brush i’ll
comb it down first and then i’ll brush
over top of it to smooth everything out
the key to doing edges is using your
fingers as a guide
use your fingers to bend the hair the
way you would like it to go
to hold pieces that you would like to
stay down like use your hand
i like to just take my comb and kind of
swoop it down in a like a half c form
and then i’ll take the brush and do the
same way
every time i comb it in a half seed i’ll
brush it down in a half seed
and i take my finger and i kind of run
behind it so that everything is smooth
all the product is in her hair
depending on your hair type sometimes
you may need a little bit more product
if it doesn’t lay down with the first
coat that you put on you can take a
little bit more product and just go over
the spots that are
kind of lifting or the spots you feel
like need more edge control
and this is the finished product.

30 Loc Knot Styles on Soft Locs

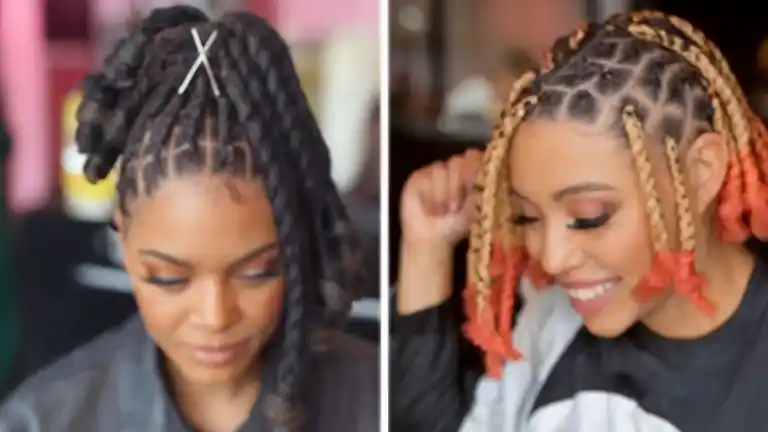
  • Barbie Ponytail Loc Knots: A high or low ponytail with sleeked-down locs, enhanced by loc knots for added volume and style.
  • Loc Knot Bob Styles: Shorter locs styled into a bob with loc knots, offering a chic and manageable look.
  • Colored Loc Knots: Incorporate color, such as ginger or pink skunk stripes, to add vibrancy to your loc knots.
  • Fringe with Loc Knots: Create a fringe by measuring locs to eyebrow length before forming knots, adding a stylish front detail.
  • Half-Up, Half-Down Loc Knots: Combine loc knots on the upper half with free-flowing locs below for a balanced style.
  • Accessorized Loc Knots: Enhance loc knots with accessories like beads, cuffs, or wraps for personalized flair.
  • Side-Swept Loc Knots: Sweep loc knots to one side for an asymmetrical and edgy appearance.
  • Layered Loc Knots: Create layers with loc knots at different lengths for added dimension.
  • Updo with Loc Knots: Style all locs into an updo with loc knots for an elegant look suitable for formal occasions.
  • Loc Knots with Undercut: Pair loc knots with an undercut for a bold and modern style.

Loc knots offer a range of styling possibilities, allowing for creativity and personalization in your loc journey.

Similar Posts

Leave a Reply

Your email address will not be published. Required fields are marked *